Wednesday, March 25, 2009

March 25th Class


BUNNY CARD- You will need a piece of cardstock 3 5/8 x 4 ¼” for the card base. Then you will need the following punched from white 2 Wide Oval, 2 Large Oval, 2- 3/4” Circles, 4 Scallop Ovals ( large ovals could also be used). From Rose Romance you need 2 Heart to Heart Punches, 6- ¼ circles, & 2 small ovals, then in Pink Piroutte you need 2 – ½ circles and then 2 – ¼ circles in black… I sponged all the edges and then adhered everything but the ears on the front and then put the ears on the inside so they show when the card is open as well.
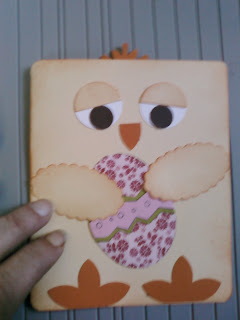
CHICK CARD – For the card base you will need Barely Banana cut to 5x8 1/4 then you will need 2 scalloped or large ovals and 1- 1” Circle cut in half from barely banana,2 five petal flowers and a snow blossom from pumpkin pie, 2-1”circle from White and 2- ½” circles from Chocolate Chip. I stamped the egg on Designer paper and then cut out… The stripes were done on Kiwi and Pink and then cut out , the pink pirouette on the inside line and the kiwi on the outline and mounted them together.


FRAMING- I took a scrap piece of cardstock and cut out a rectangle in the center. I used this as a mask over my piece of Whisper White Cardstock. Then I stamped the flowers from Botanical Blooms in Sage Shadow ink and then sponged the same color ink to fill in the rectangle. I dressed it up a little by adding paper piercing and Organza Ribbon and tone on tone stamping the same flowers on the Sage Shadow card base


MOSAIC – For this mosaic, I used scraps and a large self adhesive label .Dig in your scrap drawer, box or whatever and find some scraps of designer paper and coordinating cardstock. Tear it into tiny pieces. Then I kind of sprinkled them over the sticky side of the label and pushed them down and rearranged to cover most of the area. I added the extra pieces wherever needed. Then I took a tiny spoon and sprinkled various areas with a tiny bit of glitter. Then take embossing powder ( You can use more than one color) and fill in the rest of the sticky areas and heat emboss. Stamp images over the entire thing, I used the new Sense of Time set since it was vintage looking, and cut into 1” squares. Adhere them in any pattern on the card Base.


Stamp Club Projects


Wednesday, March 18, 2009

3/18/09 Class

CHALKBOARDING- For this card I used YOYO Yellow, Pixie Pink, Pumpkin Pie and Chocolate Chip Cardstocks. I stamped the images from Wagon Full of Fun on the Chocolate Chip using Whisper White Craft Ink, and then using Sponge Daubers and Pastels, dabbed on pastels to color the images. Then I used the Eyelet Border Punch to punch the piece of pumpkin pie card stock to dress it up a little.

MULTIPLE EMBOSS RESIST- First I inked up the fish from the Ocean Commotion Stamp Set with versamark and then baha breeze, then stamped. Then I inked up the seahorse with versamark and then creamy carmel and stamped. Then I embossed both with clear embossing powder. Then I did the shells with versamark and close to cocoa, and embossed them. The I used the Swirl from Baroque Motifs stamp set inked in versamark and Always Artichoke and embossed again… Then finally I added the swirls from Ocean Commotion with Versamark and Kiwi Kiss and stamped then embossed them. Then sponged the top with Night of Navy and the bottom with creamy caramel. The neatest thing about this is you can overlap images but the clear embossing powder will repel the new ink so it doesn’t show up and doesn’t require masking.
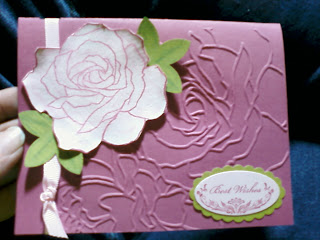
TEXTURED IMPRESSIONS – For this card I used the new Textured impressions folder to give the beautiful embossed background. Then I Stamped the Rose from Fifth Ave Floral set in Rose Red Ink on White Cardstock and cut it out, I used Watercolor crayons to lightly color areas of the flower then followed up with an Aquapainter to blend the colors. I used the edge of the horizontal slot punch on the crease of the card to hold my ribbon and then used the new Scalloped Oval punch and stamp set from the upcoming Occasions Mini for the words. I also used the Large oval punch to cut out the saying


OUTLINING- Ink your stamp with a light color ink as normal, (I used So Saffron) then take a marker (I used Really Rust and outline the inked image with the marker. “Huff” your breath on it to remoisten the ink and stamp! This gives your image an outlined look aroung the edges!


3/11/09 Class

Last weeks class:

MELTED CRAYON BACKGROUND – For this card I took a piece of Whisper White Cardstock and Wax Paper, and sharpened old crayons (just regular crayons like crayola!) over the cardstock in random colors. Then I took a dry paint brush dipped in Pearl Ex and tapped Pearl Ex over the crayon shavings. Next I covered it with the wax paper and used my heat tool to melt the wax, while rubbing a bone folder over it to smush the wax all over the cardstock. Lift up the wax paper and make sure all the white is covered. You can add more shavings if necessary, and heat again. Finally I stamped the images directly over the crayon with black craft ink and embossed with clear powder. Save the wax paper, It makes awesome embellishment!
WATERCOLORING WITH CRAFT INKS- I stamped the flowers and squiggles from Doodle This Stamp set on the Taken with Teal Card stock in Staz-On Ink. Then I made a pallet with Yoyo Yellow, Pink Passion and Green Galore CRAFT reinkers. Using my aquapainter. I picked up just tiny bits of the craft ink and painted my image. The craft ink shows up vibrant even on dark cardstocks! Then I used Mono Multipurpose Adhesive and the pink glitter from the fine cosmo glitter stack and highlighted the image.


TRI-FOLD MATCHBOOK CARD- Cut cardstock in half to measure 4 ¼ x 11 and then score at 3 5/8 and 7 1/4. Cut about ½ off one end. I used the Big Shot to cut out the L and then used Define Your Life & A Beautiful Thing stamp sets, as well as the St. Patty’s Stamp from a retired set. I also used the Slit Punch to to hold the card closed. This would also be really cute as a gift card holder by attaching a gift card inside using a mini glue dot.


LACED MEDALLION- For this card I used Brushed Gold Cardstock, Not Quite Navy and Sage Shadow. The Brushed Gold Cardstock was cut to 2 ¾ x 2 ¾ . Then using my new favorite punch…the Eyelet Border Punch. I held the cardstock as evenly as possible in the center of each edge and punched, leaving this beautiful design. The flower is the melted crayon covered wax paper embossed with Black Embossing powder using the Flower from God’s Beauty Stamp Set. I stamped it 3 times. Punched out the design 2 times with the 5 Petal Punch and cut out the remaining one and layered it with dimensionals.

Thursday, March 5, 2009

What a week!

I know... I know... I am late posting this week! I have had one heck of a week!


First I would like to thank everyone who came to Stamp Camp as well as my friend and downline, Emma, who co-hosted the camp with me, and April, my oldest daughter who helped us out during the morning session! I hope everyone had a great time!!!It was a lot of fun and everyone seemed to really enjoy themselves! That was my fun part of the week!!

Sunday, I was so excited! I love snow and we were supposed to get a nice snowstorm!! YAH!!! I couldn't wait until Monday to go out and play! Well, since I had slept in on Sunday and school was already cancelled on Monday, I stayed up late watching TV. It was about 1 am, and I heard this exploding sound that actually shook the house!! I jumped up and went running upstairs, as soon as I got to the top of the steps, I saw it!!! 18,000 gallons of water flooding my backyard and a tree laying across my crumpled pool! Not sure what I thought I could possibly do, I threw on shoes and went running outside... My husband was right behind me. All of a sudden I slipped and went falling backwards and he tried to catch me but instead I slammed my hand into him and down I went on my wrist!! He helped me up and we looked how bad the damage was with the pool... YEP! DESTROYED! So we go in the house and my hand has completely bruised and swelled. Great! Thankfully it was just a bad sprain and yes, the insurance company is supposed to cover a replacement pool. well we have $1000 deductible but it is better than paying $6000 for a new pool... oh and a new roof and stuff for the shed which it hit before rolling off on the pool. I had to have April come over and cut all my cardstock for this weeks class and I figured it would be pushing it to ask her to blog for me too so that is why I am late!
So anyway... on with the projects...
RIBBON TRIM- If you look at the ribbon you will see it is celery trimmed with chocolate chip. It was originally just Celery. I laid it flat on a piece of scrap paper and held it still while drawing a line with my marker beside it, just touching the edge. This will allow ink to get just on the edge of the ribbon. I also used the plastic wrap technique on this card. I crumpled Plastic Wrap and inked it and used it to ‘sponge’ ink on card to give a little different background. You can see it behind the flowers.

SLIDER CARD – I used Baja Breeze, Chocolate Chip, and Very Vanilla Cardstock. I used the Horizontal Slot Punch on the edges of the Wide Oval Punch and then adhered ribbon to the back of the card stock, went in slot on top of oval on one side and came up through the slot on the bottom of the other side and then adhered the other end of the ribbon on the back of the cardstock. This makes a SLIDER. The piece that has So Kind slides back on forth on the ribbon to show either set of words or leave it in the middle to show both!!

SLANTED FRONT- For a little different look, I cut the Bashful Blue card base 5 ½”x 8 and scored at 4 ¼ . Then cut diagonally from score to 1” down on the other edge. The Sale a Bration Designer Paper was cut 5 x 3 ½ and cut on the same angle. I added a piece of textured Kiwi Kiss inside so the color would show and bring out the colors in the paper. The insert was cut at 5 x 3 ¾ . Then I used various Circle Punches with the Seeing Spots and Think Happy Thoughts Stamp Sets.

PUNCH SHEEP- On this card, I used Perfect Plum, Pale Plum, vellum, Whisper White, Basic Black and Mellow Moss Cardstock. I random stamped the Easter Wishes Stamp tone on tone for the background. For the Sheep, I used the Trio Flower Punch, Large Oval (cut off a little less than half, Heart to Heart Punch (only used 1 heart cut in half for ears), Scalloped Circle Punch, and the Word Window Punch (cut in half to make 2 legs)