Wednesday, February 25, 2009

Feb 28th Stamp Camp Sneak Peak!!


If you haven't registered for Saturday's Stamp Camp, there are some afternoon seats available! Please email me ASAP... Here are a few sneak peaks of what everyone will get to make... and this is not even all of the projects!! We will also be making a Picture the Seasons Frame, which is a Wooden Picture Frame with a stamped image that you can change for each season and a Mother's Day Card with a Dyed Silk Flower from the Pretties Kit ... Also if you look closely at the Easter Card, those are removable bobby pin flowers that can be worn in your hair!!

Now for this weeks Class....

SHADING EMBOSSED IMAGES-First I stamped the 3 flowers from Embrace Life Stamp set in versamark on Summer Sun Cardstock and 1 time on Always Artichoke.
Then I heat embossed them with gold embossing powder. Using my aquapainter and Pumpkin Pie ink, I just added some lines of shading around the center of the summer sun flowers going all the out to the edge without reinking. I cut the Artichoke flower into 4 sections and used it for leaves. Also I double stamped the word Celebrate in Summer Sun and Pumpkin Pie to give it the faux embossed look.


HINGE CARD – For this card I used a 3x 4 ¼ piece of Barely Banana and Pink Pirouette, and then a 4 ¼ x 5 ½ piece of Baja Breeze. I used the scallop punch on the Banana then adhered it to the Baja, leaving about ½ at the top with no adhesive. I decorated the Pink piece and attached the chick only by putting adhesive only at the top and then attached the pink piece only using a brad on one side about ½ under the Banana piece. The card will now open on the “brad hinge”. When closed the mounted chick goes in front of the Banana and the pink goes behind it.


PUNCH SHAMROCK- On this card, I stamped the heart from Polka Dot Punches Stamp Set 4 times on Mellow Moss using Handsome Hunter Ink and punched them out with the heart punch. Then I also stamped the Good Luck and punched it with the Designer Label Punch. I stamped the background with Vanilla Craft ink using the circular stamp from the same set. Then adhered the 4 hearts together. I used Linen Thread to tie a knot on the button and adhered it to the center. Then I adhered the “good luck” to the card and just put a Vanilla Hodgepodge Hardware piece over it using the vanilla brads.


MICROBEAD FLOWER CENTER- Microbeads can be used to highlight and decorate in many ways. One of my favorite ways to use them is to punch a ½ circle of cardstock (summer sun in pic) and place a pop up glue dot on it. Squeeze edges slightly to make it fit the circle perfectly. Then just press it down in your container of
Microbeads. This makes the perfect center for flowers. In the sample, I used this technique on a Fresh Cut Note with the Fresh Cuts Stamp Set and a 5 petal flower punch.


February Club


I never made it back on last week to post the other 2 projects that my club members got to make last Thursday, so I figured I would post them now! Everyone really seemed to like Elmo!!

Wednesday, February 18, 2009


I can not wait until my kids are better! I have had at least one home sick every day for the past week and a half... come on spring!! Thank goodness I have I not caught anything yet!! I don't have time to be sick HAHA! I have class tonight and the hostess club tomorrow night and class and stamp camp next week. Wonder if I can overdose on vitamin C?!?! Let's hope not! Here is a sneak peek of one of the projects for tomorrow night's club... It is made using one of the new texture templates for the big shot and One of a kind stamp set. I love these texture plates, they really add pizazz to any project and is so quick compared to dry embossing!


For tonight's class, I am teaching stamp positioning using the Stamp a Majig. Here is the scoop:
STAMP POSITIONING – Sometimes you come across a stamp set that really needs exact positioning to get the best result. A stamp-a-majig makes it easy! First I stamped the tree trunks on the cardstock and set aside. Then I lined up a piece of vellum in the corner of the stamp-a-majig, and then stamped directly down on it by using the inside corners of the T to guide the stamp. This is now your guide. Line up the image on the vellum exactly where you want it on the cardstock you are stamping. Then place the stamp-a-majig on the corner of the vellum, and without moving the “T”, take away the vellum and stamp directly down in the corner of the T. Your image will be exactly where you wanted it.


Everyone will also be learning how to make the following projects:
FAUX PUNCHED TIN CABINET- You will need 2- 1”x4 ¼ strips, 2- 1”x 5 ½” strips, and 5 ½”x 8 ½ card base (creamy caramel on sample) then a 3x4 piece of brushed so silver cardstock. First I took my paper snips and made some dung marks with the point of the scissors and added some scratches. The using direct to paper, made some swipes on the strips for a wood appearance. I stamped the silver with a stamp from Polka Dot Punches (any dot design would work) and then lightly sanded each piece. I held each long and short strip together in an “L” shape and cut diagonally to “miter” the corners. Then just adhere it all together...

HEARTS FLOWER- Using 6 hearts (mine were so saffron) lightly add color using a craft pad (I used Regal Rose) then ink just the edges using a darker shade of craft ink (I used Rose Red). Adhere 3 hearts to your cardfront, with tips touching. Then cover the excess spaces between them with the remaining 3 hearts. I used brads for the flower center but glitter, cardstock, ink etc could be used instead.


Last but not least the:
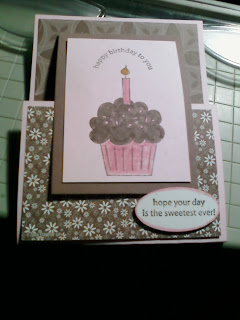
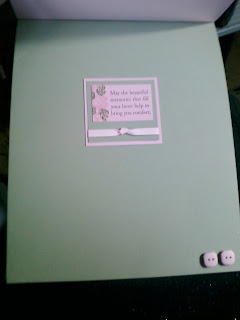
JOY FOLD CARD- You will need one piece of cardstock 4 ¼" x 8 ½",one piece of cardstock 3" x 8" ,one piece of patterned paper 4" x 5 ¼" and one piece of different patterned paper 2 ¾" x 4"and then any cardstock you need to decorate it. Start by scoring the 4 ¼ x 8 ½ piece at 5 ½ then score the 3x8” piece at 4”. Cover the 5 ½ inch section with the lg. pc. Of paper and the flap with small. Decorate the 3x8” piece as desired and attach ½ of it to the base. The other half will fold over the flap. Notice the small oval on the bottom. It is adhered with a dimensional so the very edge of the cupcake piece will fit under it to “lock’ the card.


Wednesday, February 11, 2009

Good Afternoon!

I am so sorry I have not posted to much in the past week or so! I have been soooo busy. Saturday I went to a 12hr long scrapbooking crop, so I spent most of the week packing up supplies and things for that... I must brag and say I got 29 pages done! Then Monday night I had the local Pop Warner Board Meeting, then last night was the State Pop Warner meeting in Seaford....Anna, my 13 yr old got sick on Sunday, so yesterday morning I took her to the doctor which is 45 minutes away.... THE FLU! UGH! So the doctor told me if I got the other 2 littles ones their flu shot ASAP then it might help to keep them from catching it... The only time they could fit them in was yesterday afternoon, so I brought Anna home, went to the elem school, got Alyssa, then the middle school to get Alex and then the 45 minute ride back to the doctor for their shots.... we had the gourmet McDonalds for dinner and then I came in the house for about an hour or so and out the door to the board meeting... I got home at about 10 and started planning for tomorrow nights class... Just finished everything up.... hope you enjoy!
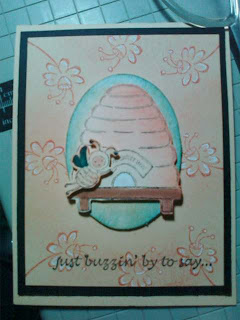


HIGHLIGHTING- Stamp images as desired. I randomly stamped the daffodil from the Just Buzzing By Stamp set. Then using a white gel pen, outline small areas of the image. This not only highlights the design but it also adds the illusion of dimension.
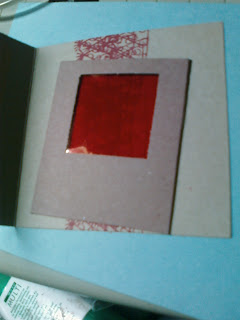


DECODER CARD- This is a really fun interactive card design. Stamp a message design or phrase with a light blue ink such as Bashful Blue or Baja Breeze. Then stamp over and over the image in a red ink. I used Rose Red but it really depends on what brand or shade your cello wrap is. Then make a small decoder using a piece of red cellophane gift wrap adhered inside cardstock with a hole. When held over the ‘secret message’ only what you stamped in blue will show up

MOONLIGHTING- Using a scrap piece of cardstock. Punch a circle. Use the piece of cardstock with the hole as a template for where you want your moon or sun. Using a sponge and a yellow ink (I used More Mustard sample) and sponge ink in the hole very lightly in the center getting darker toward the edges. Then use the circle you punched and cover the moon/sun and sponge either light blue, dark blue, grey etc. around the circle to create the sky. Remove the circle and stamp desired image
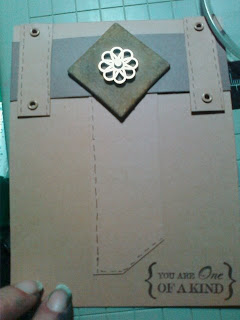


FAUX SUEDE- It is a little hard to see the faux suede in the picture, but it is used on the belt buckle. Take a piece of chipboard, and using direct to paper, swipe over it a few times with close to cocoa ink. Let dry, then repeat with Creamy Caramel. Let Dry and repeat with More Mustard. It actually turns out better if you do not completely cover it each time. The light and dark variances actually gives it more of the suede look.

Tuesday, February 3, 2009

Hard cards to make...


The hardest cards for me to make are sympathy cards... One because it is always sad to make and two because most people usually keep sympathy cards forever in a memory box, or at least I did when I lost my son. One of April's close friends passed away suddenly on Saturday in his sleep, so sad. He was only 18 yrs old and had his wisdom teeth removed at the beginning of the week. The autopsy report is not back yet, but they are thinking either sepsis or meningistis due to infection from the dental work! How sad for such a young life to be lost so quickly from something so simple as his wisdom teeth being removed. April came over today and asked me to make a really big card so all his friends could sign it and they could present it to his grandmother with whom he lived. She said there needed to be room for 20-30 signatures. I used 3 sheets of 8 1/2 x 11. Pink Piroutte, Mellow Moss, and Natural Ivory. I scored 1/2 inch from the top of the Pink cardstock and attacthed it to
the Mellow Moss with Eyelets then used the Rose is a Rose Stamp set along with a retired set called A Brighter tomorrow. I used Pink Piroutte, Pretty in Pink, Mellow Moss , & Always Artichoke Inks. Then added Dazzling Diamonds to accent each flower (with Tombow Multipurpose Adhesive). I cut around the flowers and added some ribbon and a couple buttons to fancy it up a little.
Rest in peace, Payton!
Tanya